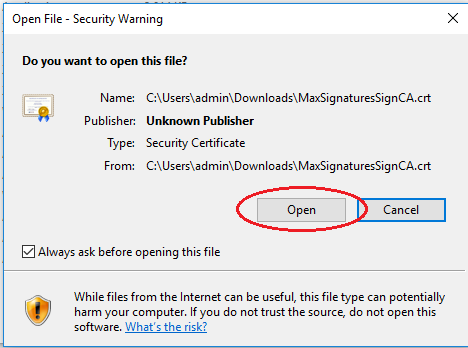
Download the MaxSignatures Root CA Certificate .
.
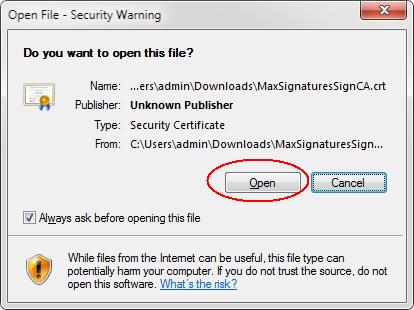
Click Open
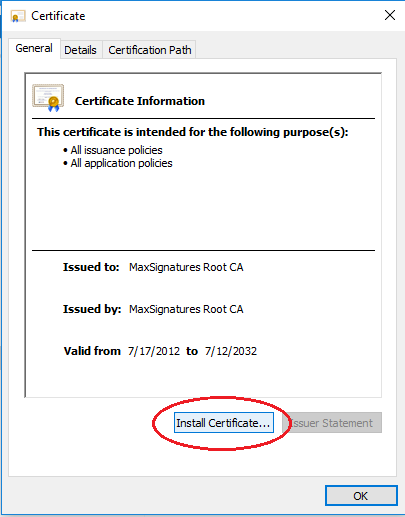
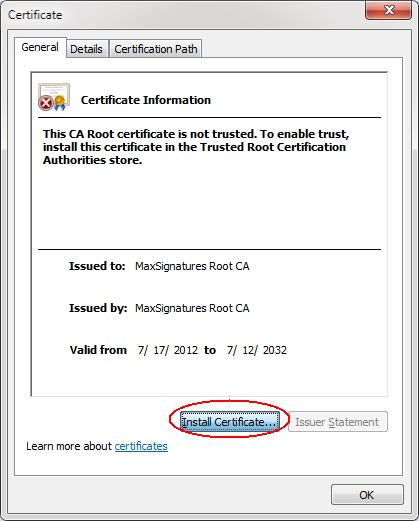
Click Install Certificate...
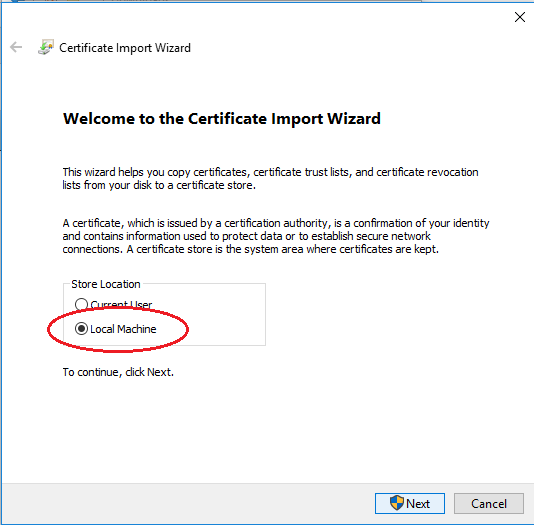
Choose Local Machine and click Next
Choose Place all certificates in the following store, and choose Trusted Root Certification Authorities, and Finish.
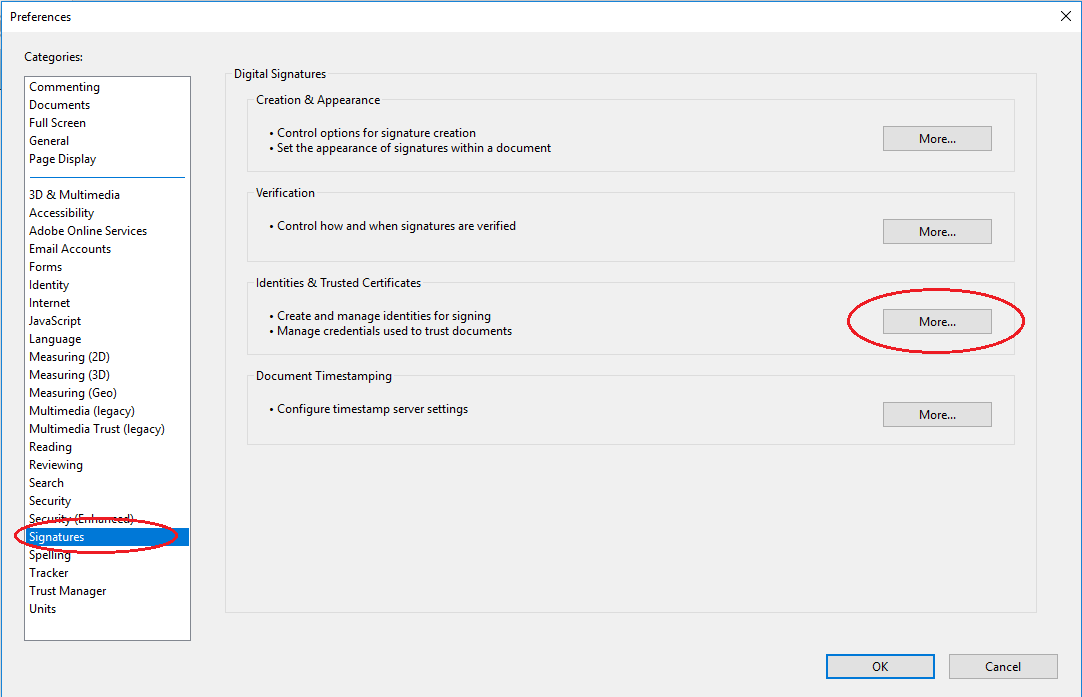
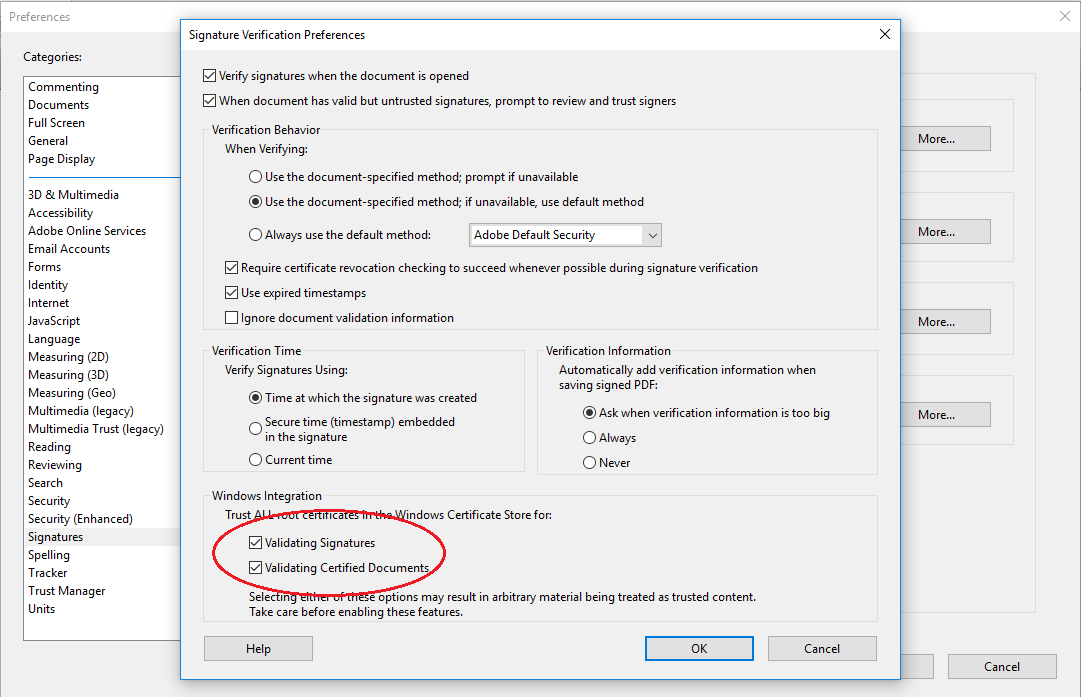
Open Adobe Reader, click Edit > Preferences...

Choose Signatures > Identities & Trusted Certificates
Trust all root certificates in your Windows Certificate Store. And Click OK.
Download the MaxSignatures Root CA Certificate .
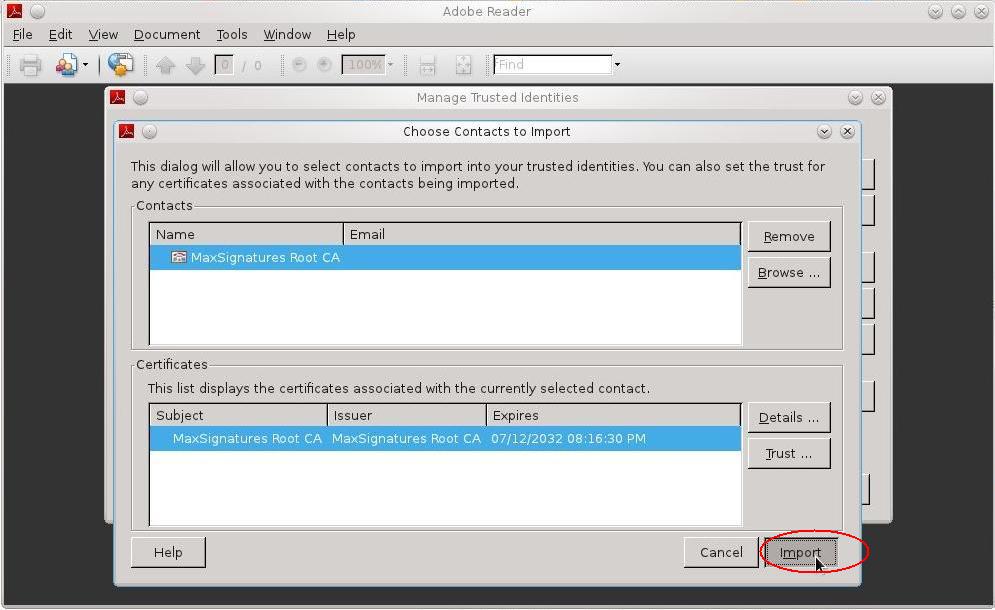
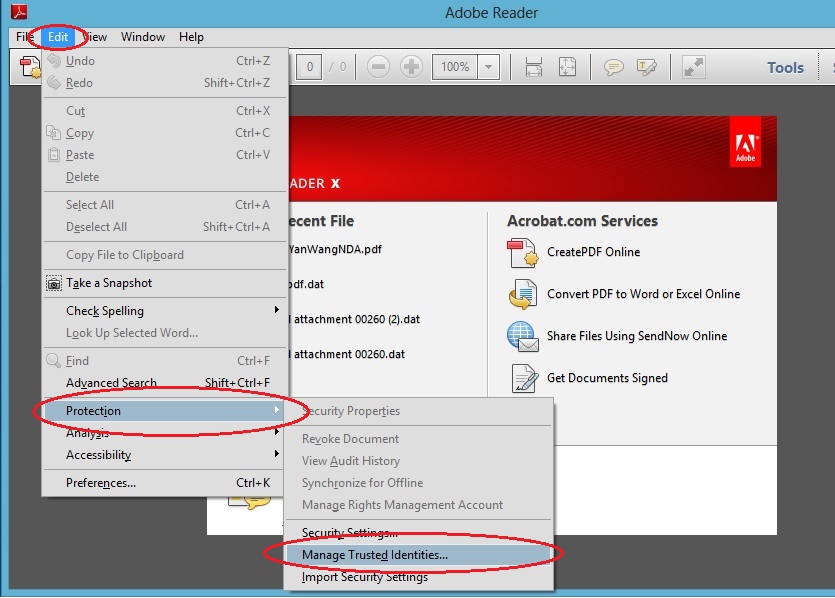
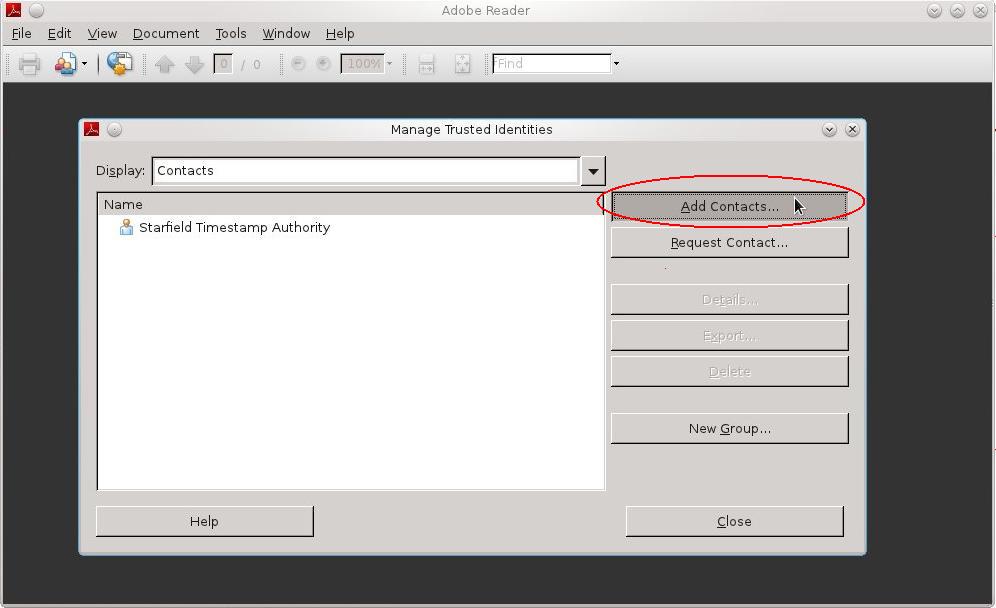
Open Adobe Reader, click Edit > Protection > Manage Trusted Identities
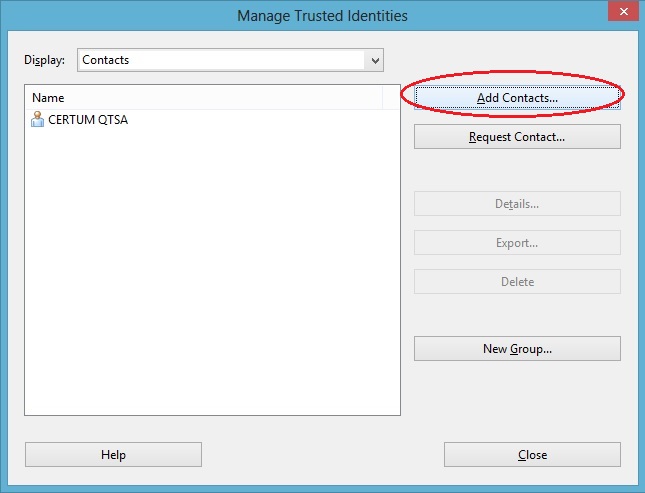
Click Add Contacts
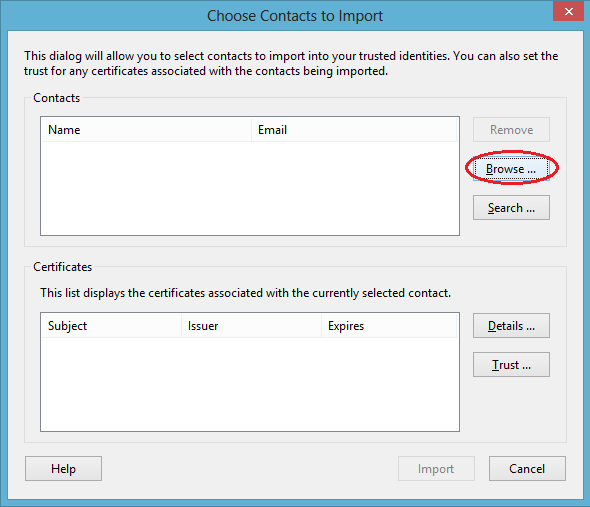
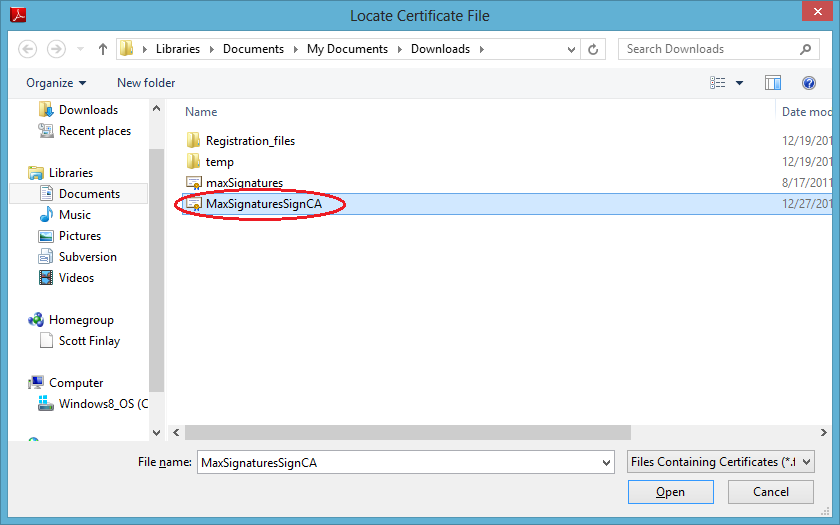
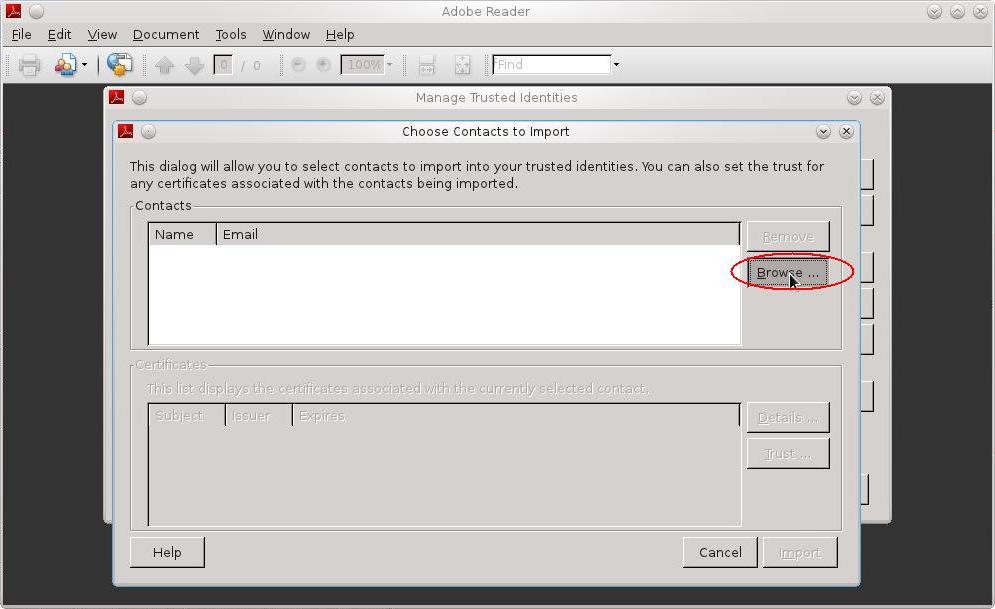
Click Browse and select the MaxSignatures CA Certificate you downloaded.
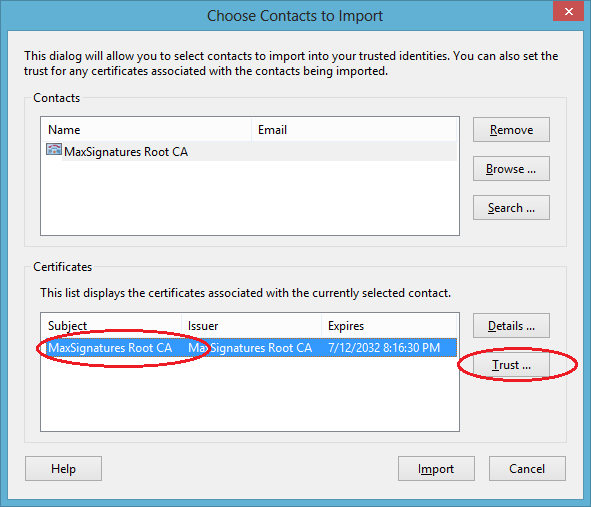
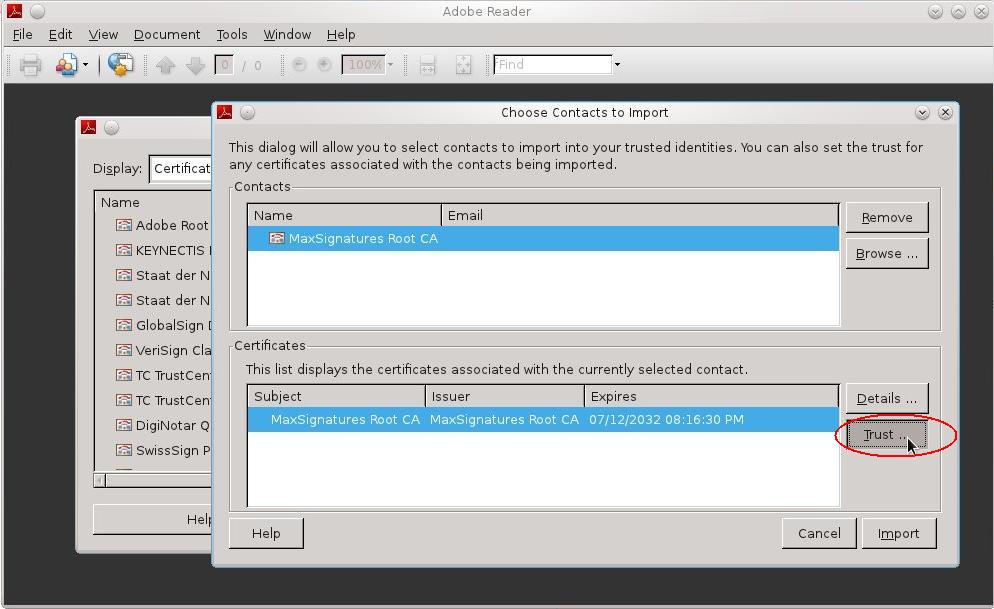
Click Trust.
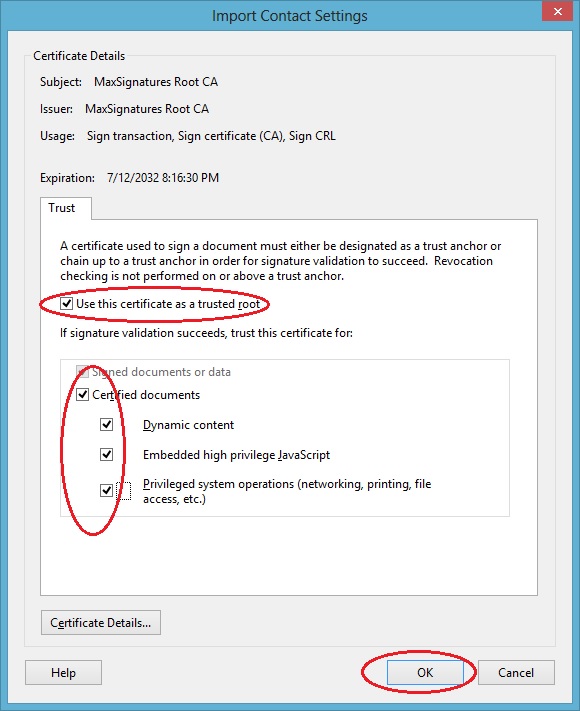
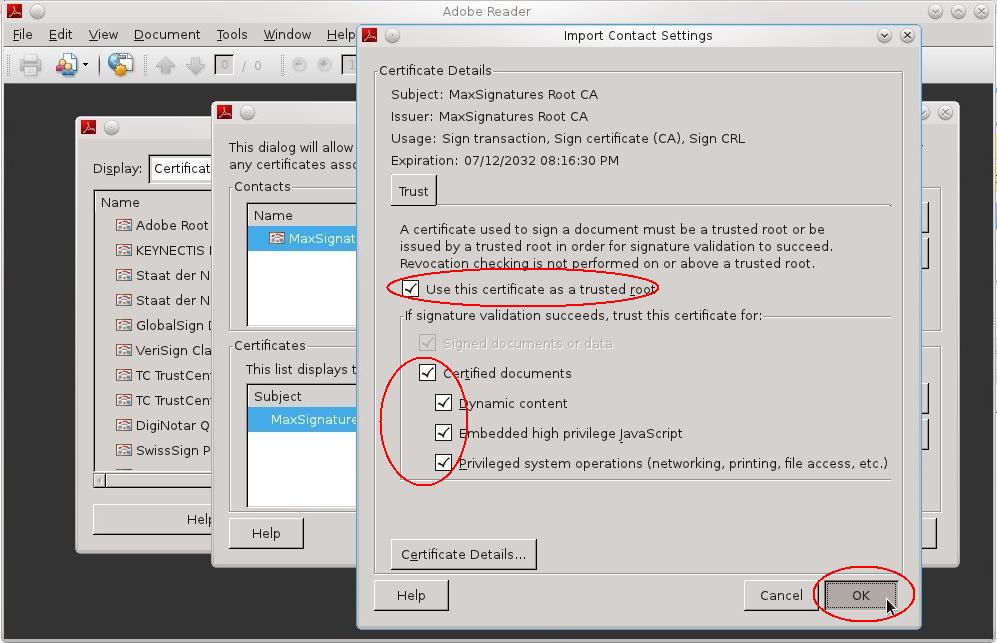
In the Import Contact Settings dialog, check all the check-boxes and click OK.
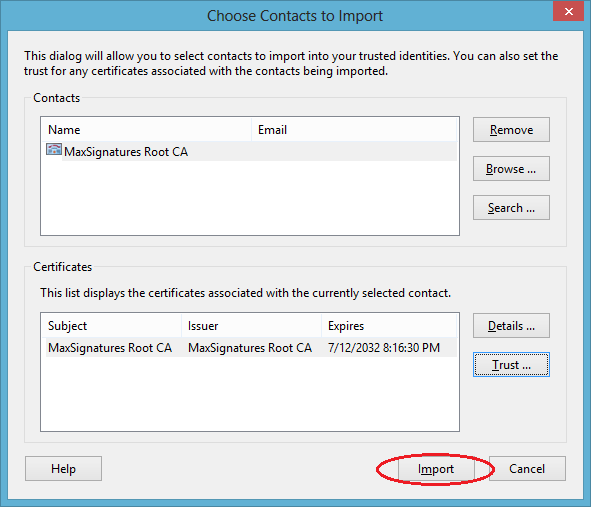
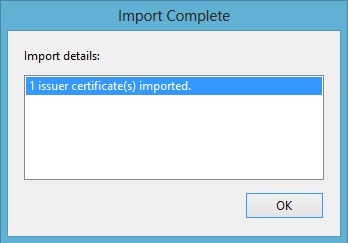
Click Import to complete.
Download the MaxSignatures Root CA Certificate .
Click to open the downloaded certificate. Click Install Certificate.
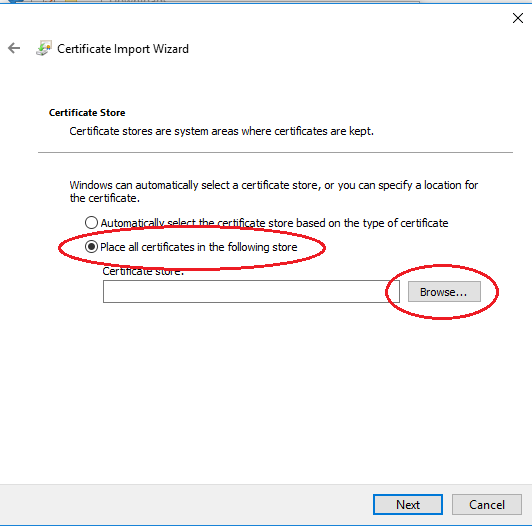
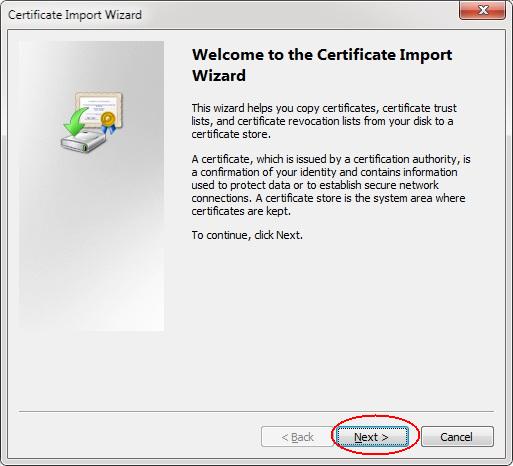
In the Certificate Import Wizard, select Place all certificates in the following store and click Browse to choose certificate store.
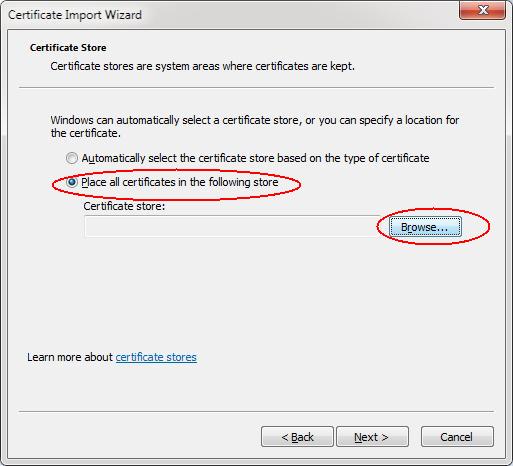
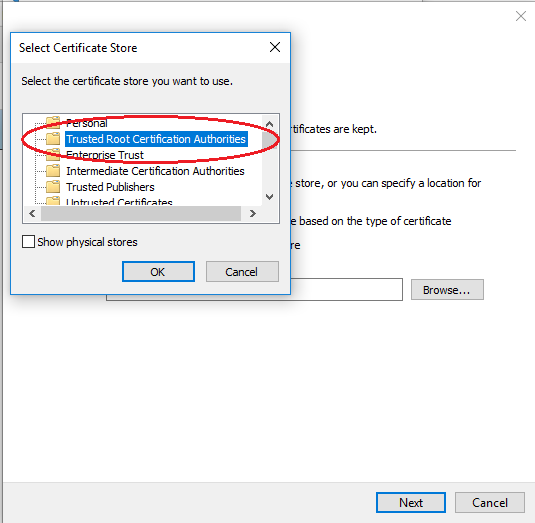
In the Select Certificate Store dialog, choose Trusted Root Certification Authorities and click OK.

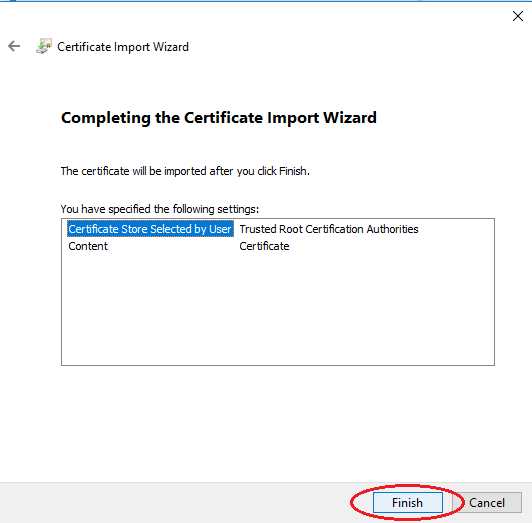
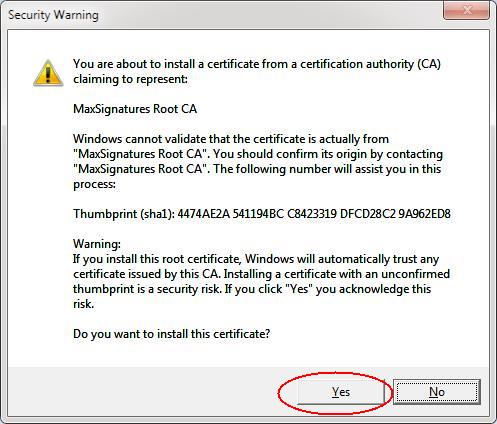
Once finish the Certificate Import Wizard, a warning dialog will show up. It is warning that you are about to install the MaxSignatures Root CA.
Click Yes to complete the installation process.
Download the MaxSignatures Root CA Certificate .
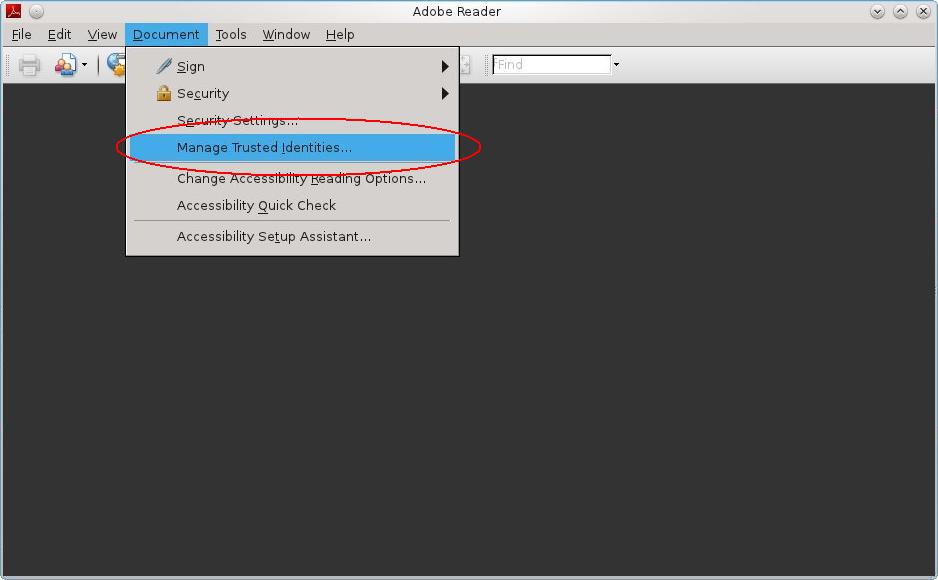
Open Adobe Reader, click Document > Manage Trusted Identities
Click Add Contacts
Click Browse and select the MaxSignatures CA Certificate you downloaded.

Click Trust.
In the Import Contact Settings dialog, check all the check-boxes and click OK.
Click Import to complete.